All Access Arcade uses affiliate links for products we love and may earn a commission on purchases made through these links.
Picture this: you’re watching the latest State of Play and see a trailer for a new game that gets you super hyped. The final screen flashes the release date, and you jump online to pre-order the game…only to find out the release date is for another country.
Upon further research, they haven’t announced a release date for your region yet. Or it’s so far in the future you can’t imagine waiting that long. What’s a gamer to do?
Set up a PlayStation Network account in a new region, of course!
Changing the Region on Your Existing Account
Let’s get this out of the way first: you cannot change the region on an existing PlayStation Network (PSN) account. Your existing PlayStation account, and the email associated with it, are locked to the region you selected when the account was created.
That being said, there are ways around this problem. Let’s look at solutions that allow you to access content in any region of your choice.
Why Should I Change My Region?
There are many reasons why you might want to have a PSN account in a different region. Different regions offer different pricing, discounts, and games.
Games often release at different times for various regions. So, if there’s something you really want to play, having a PlayStation Network account in a region with an earlier release date will allow you to access the game sooner.
Fans can also avoid lengthy localization times by having a PSN account in the game’s original release region. This most often applies to Japanese games that can take years to localize. In some cases, games may never receive an official translation or release in other regions.


The Trails series is a classic example of long localization times. Kuro no Kiseki was released in Japan on September 30, 2021. The English version, Trails Through Daybreak, is set to release in mid-2024. (Images L-R: Nihon Falcom, NIS America)
Changing your PlayStation Network account region also allows you to access the highest-tier PlayStation Plus membership available for that region. Changing your region to a location that offers the Premium-level PlayStation Plus account will allow you to access game streaming.
When setting up your PSN account in a new region, remember that the account interface will be in that country’s native language. If a country has several languages available, you can select your preferred language during account set-up. This will only change the language of your account interface, not the in-game language.
When You Don’t Need to Change Your Region
Before you create a PlayStation Network account in a new region, assess if you actually need a new account. Ask yourself why you want to set up an account in a different region to begin with.
If it’s because you want access to different games or PlayStation Plus tiers, you definitely need a new account. Follow the steps in the next section to set up an account in the region of your choice.
However, if you are trying to get around geo-blocked content on apps like Netflix or Crunchyroll, a PlayStation Network account in a different region will not solve your problem.
Apps like Netflix use your IP address to determine which content you can access. In this case, it’s not the region of your PSN account that matters but the location of your IP address. To get around this, you can change your location using a VPN.
Some apps, like Hulu, are based on your PlayStation Network account region and IP address. In these cases, you will need to create a new PSN account in the region where the app is available and use a VPN to change your location.
Setting Up an Account in a Different Region
Okay, so you’ve evaluated whether or not you actually need a new PlayStation Network account in a different region. Let’s get it set up!
This process is very simple – it’s the same as setting up any other PlayStation Network account. The main difference is selecting your desired region and providing some information specific to that area.
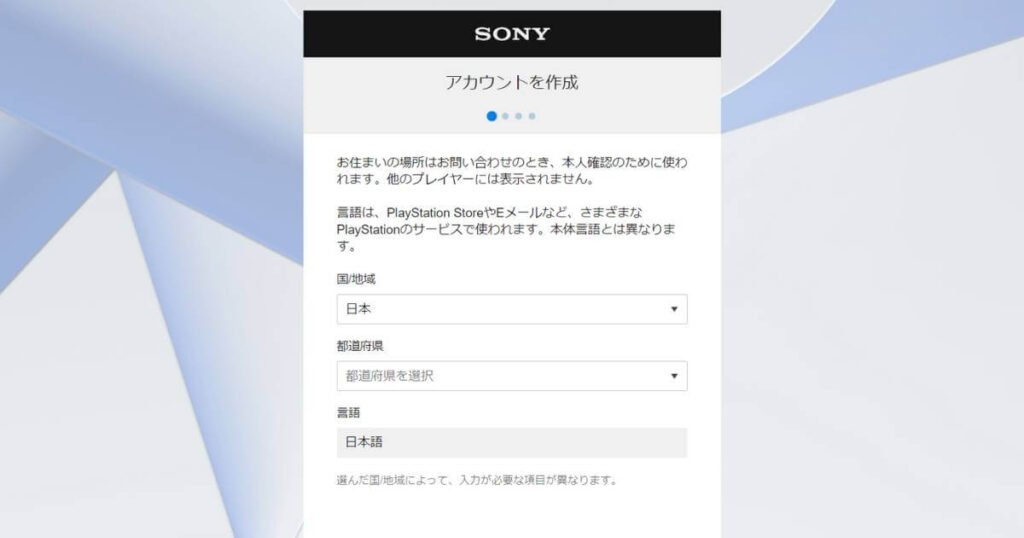
Start by going to the Sony account creation site and clicking “create.” On the next page, choose your desired county/region. Some regions also require a state/province/prefecture. We recommend choosing a large area, such as Tokyo, if you are setting up a Japanese account. Make a note of the city you choose, as it will be important during the final stages of account set-up.

Example of the region selection screen when setting up a Japanese PSN account. (Image: All Access Arcade)
Continue through the account creation process as usual. When prompted for your email address, make sure to use one that is not associated with another PlayStation Network or Sony Entertainment account.
Tip! If you have a Gmail account, you don’t need to create a new email address. |
After you’ve verified your email and finished all the steps on the account creation site, go to the PlayStation Network page to finish setting up your account. Here, you will be required to fill out some residential information (varies by country). Usually, a ZIP/postal code is required. A quick Google search will reveal some associated with the state/province/prefecture you chose during the initial account set-up.
Finish filling out the following screens, and your account is ready to go! Make sure to set up a new user on your PlayStation console and link it to the newly created PSN account.
Follow this step-by-step video if you need help setting up a PlayStation Network account. Remember to select the correct region!
Paying for Purchases in a Different Region
Now that your brand-new PlayStation Network account is set up in your desired region, there’s just one more thing to take care of before you can start playing all those region-locked games: payment.
While there are free games available, most of them come with a price tag attached. There are three ways to pay for purchases on the PlayStation store: credit card, PayPal, and gift cards.
Unfortunately, you can only pay for PlayStation Store purchases or add funds to your account with a credit card or PayPal account registered in the same region as your PlayStation account, which leaves the third option: gift cards.
When buying games/adding funds to your PlayStation account with a gift card, the currency must match the account’s region. You can’t buy a PlayStation gift card in US dollars, euros, or British pounds and then use it on a Japanese PSN account.
Be careful! PlayStation gift cards only work with an account from the same country |
But how do you buy gift cards in the currency that matches your new PlayStation Network account? You can’t just walk into your local game store and ask for a PlayStation gift card in euros if you live in Australia. Easy – use the internet!
The easiest way to get a gift card with the correct currency is to buy a digital one through an online shopping site. These gift cards will be delivered to your email or stored in your profile on the shopping site. Make sure you’re using a reputable site to buy digital gift cards and check the reviews to make sure the seller is reliable.
Digital PlayStation Store Gift Cards | |

| 
|
Adding a Gift Card to Your PlayStation Network Account
Once you have a gift card code, boot up your PlayStation and select the user profile associated with the alternate region account you created earlier. On the home screen, select the PlayStation Store.
For PS4 users, scroll down the menu on the left side of the screen until you see “Reedeem Codes.” PS5 users should press triangle and then access the menu on the top right of the screen; under “More”, select “Redeem Codes.”
Enter the 12-digit gift card code using the on-screen keyboard. The codes are not case-sensitive, and you don’t need to add spaces or hyphens. Once the code is entered, hit the R2 button. Then select “Continue” or “Redeem,” depending on your console.
On PlayStation 4, you will be prompted to confirm the amount that will be added to your digital wallet. On PlayStation 5, a preview will be displayed on the code redemption screen. You have now successfully added funds to your regional PlayStation Network account.

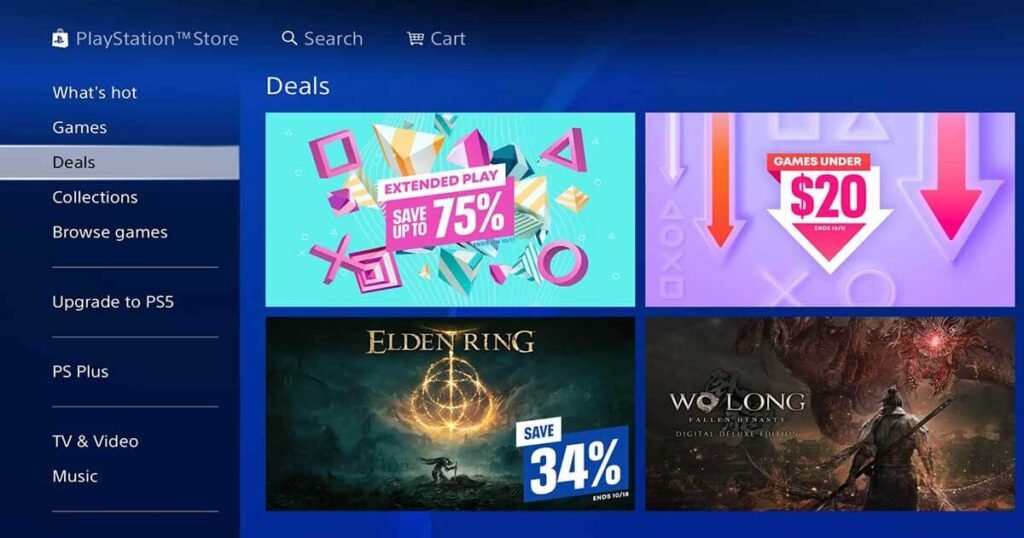
Not sure what to buy with your newly added account funds? Check out the “Deals” tab in the PlayStation Store for inspiration. (Image: All Access Arcade)
Setting up a new PlayStation account in another region is a great way to access games not available where you live. When you use your regional account to buy and install games on your console, they become available to everyone with a user profile on your PlayStation. This allows you to buy a game from a different region but play the game with your main PlayStation Network account and keep your trophies under one profile.
So what are you waiting for? Go shopping with the funds you just added to your account and try out some regional exclusives. Happy gaming!
Featured Image: PlayStation, All Access Arcade


Add comment